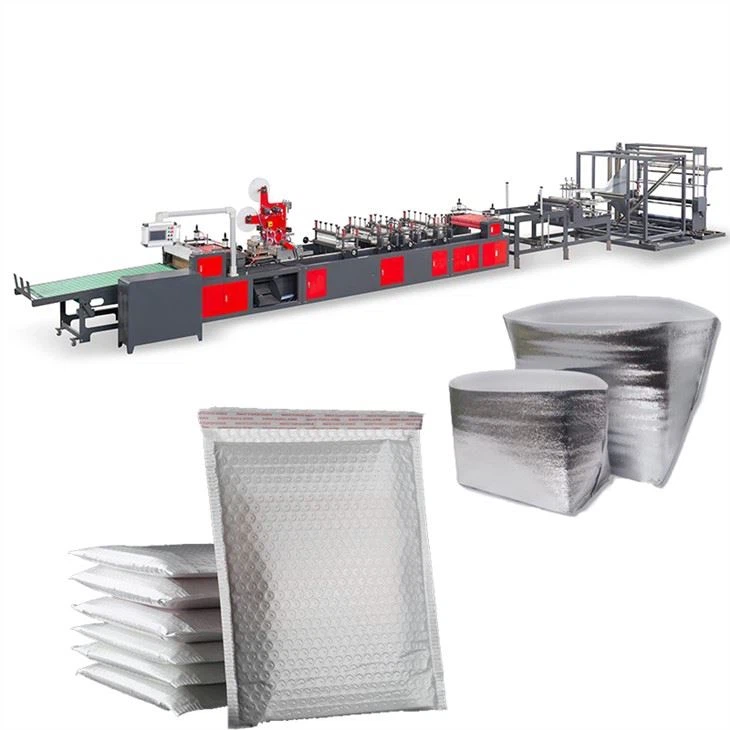
A bottom seal bag making machine is an essential piece of equipment in the packaging industry, widely used for producing various types of bags such as plastic bags, paper bags, and more. Over time, certain parts of the machine may become worn out due to continuous operation, which can affect the machine's performance and the quality of the produced bags. As a trusted supplier of bottom seal bag making machines, I am here to share a comprehensive guide on how to replace the worn - out parts of a bottom seal bag making machine.
Identifying Worn - Out Parts
The first step in replacing worn - out parts is to accurately identify them. There are several key components in a bottom seal bag making machine that are prone to wear and tear.
- Cutting Blades: These are responsible for cutting the bags to the desired length. Over time, the blades can become dull or chipped, resulting in uneven cuts or incomplete severing of the bags. You can check the cutting quality; if the edges of the bags are ragged or the machine struggles to cut through the material, it's likely that the cutting blades need replacement.
- Sealing Bars: The sealing bars create the bottom seal of the bags. Continuous heat and pressure can cause the surface of the sealing bars to wear out, leading to poor sealing quality. Signs of a worn - out sealing bar include weak seals, leaks, or inconsistent seal widths.
- Conveyor Belts: Conveyor belts transport the bags through the machine. They can experience wear from friction, and may stretch, tear, or develop holes. If you notice that the bags are not moving smoothly or are slipping on the conveyor belt, it might be time for a replacement.
- Bearings: Bearings are used in various moving parts of the machine to reduce friction. Worn - out bearings can cause noise, vibration, and increased energy consumption. You can listen for unusual noises coming from the machine or feel for excessive vibration to detect bearing problems.
Preparing for Replacement
Once you have identified the worn - out parts, it's important to prepare for the replacement process.
- Gather Tools: You will need a set of appropriate tools for the replacement. This may include screwdrivers, wrenches, pliers, and a torque wrench. Make sure all the tools are in good condition and of the correct size for the machine's components.
- Source Replacement Parts: As a bottom seal bag making machine supplier, we offer a wide range of high - quality replacement parts. Ensure that you get the exact parts that are compatible with your machine model. Refer to the machine's manual or contact our technical support team for assistance in selecting the right parts.
- Safety First: Before starting any replacement work, make sure the machine is powered off and unplugged. Wear appropriate safety gear such as gloves and safety glasses to protect yourself from any potential hazards.
Replacing the Worn - Out Parts
Now, let's go through the step - by - step process of replacing some of the common worn - out parts.
Cutting Blades
- Remove the Old Blades: Use a screwdriver to remove the screws that hold the cutting blades in place. Carefully take out the old blades from the machine, being cautious not to damage any surrounding components.
- Clean the Blade Holder: Use a clean cloth to remove any debris or residue from the blade holder. This will ensure a proper fit for the new blades.
- Install the New Blades: Place the new cutting blades in the blade holder and align them correctly. Tighten the screws using a screwdriver, but be careful not to overtighten as it may cause the blades to warp.
- Adjust the Blade Tension: Some machines require blade tension adjustment. Refer to the machine's manual for the correct tension settings and use the appropriate tools to make the adjustments.
Sealing Bars
- Disconnect the Power: Ensure that the power to the sealing bar is disconnected to avoid any electrical shocks.
- Remove the Old Sealing Bars: Use wrenches to loosen the bolts or nuts that hold the sealing bars. Gently lift the old sealing bars out of the machine.
- Inspect the Sealing Bar Mounting: Check the mounting surface for any damage or debris. Clean it if necessary.
- Install the New Sealing Bars: Place the new sealing bars in the mounting position and secure them with the bolts or nuts. Make sure they are properly aligned.
- Reconnect the Power: Once the new sealing bars are installed, reconnect the power and test the sealing function.
Conveyor Belts
- Stop the Conveyor System: Turn off the machine and engage any safety locks to prevent the conveyor from moving.
- Remove the Old Belt: Loosen the tensioning mechanism of the conveyor belt. Slide the old belt off the pulleys.
- Clean the Pulleys: Use a brush or a cloth to clean the pulleys. Remove any dirt or debris that may affect the performance of the new belt.
- Install the New Belt: Place the new conveyor belt on the pulleys and adjust the tensioning mechanism to the appropriate tension. Make sure the belt is centered on the pulleys.
- Test the Conveyor: Turn on the machine and check if the conveyor belt is running smoothly. If there are any issues, such as slipping or misalignment, make the necessary adjustments.
Bearings
- Locate the Bearings: Identify the location of the worn - out bearings in the machine.
- Remove the Components: In some cases, you may need to remove other components to access the bearings. Use the appropriate tools to disassemble the relevant parts.
- Remove the Old Bearings: Use a bearing puller to remove the old bearings from their housing. Be careful not to damage the housing or other nearby components.
- Clean the Bearing Housing: Clean the bearing housing thoroughly to remove any dirt or old lubricant.
- Install the New Bearings: Apply a small amount of lubricant to the new bearings and carefully press them into the housing using a bearing installer.
- Reassemble the Components: Put the disassembled components back together in the correct order.
Testing the Machine
After replacing the worn - out parts, it's crucial to test the machine to ensure that it is working properly.
- Power On the Machine: Plug in the machine and turn it on. Check for any abnormal noises, vibrations, or error messages.
- Run a Test Production: Feed some test materials through the machine and produce a few bags. Inspect the bags for cutting quality, sealing quality, and overall appearance. If there are any issues, double - check the installation of the replaced parts and make the necessary adjustments.
Importance of Regular Maintenance
Replacing worn - out parts is just one aspect of maintaining a bottom seal bag making machine. Regular maintenance can prevent premature wear and tear and extend the lifespan of the machine.
- Scheduled Inspections: Conduct regular inspections of the machine to detect any potential problems early. Check the condition of all components, including belts, blades, and bearings.
- Lubrication: Proper lubrication of moving parts can reduce friction and wear. Follow the machine's manual for the recommended lubrication schedule and use the appropriate lubricants.
- Cleaning: Keep the machine clean to prevent the accumulation of dirt and debris, which can affect the performance of the machine.
As a bottom seal bag making machine supplier, we also offer other types of bag making machines, such as the Clothes Bag Machine, Servo Motor Control Bag Making Machine, and Double Color T - shirt Bag Making Machine. These machines are designed to meet different production needs and offer high efficiency and quality.
If you are in the market for a bottom seal bag making machine or need replacement parts and technical support, we encourage you to contact us for a detailed discussion. Our experienced team is ready to assist you in finding the best solutions for your packaging requirements.

References
- Manufacturer's manual of the bottom seal bag making machine
- Industry standards for bag making machine maintenance and repair


